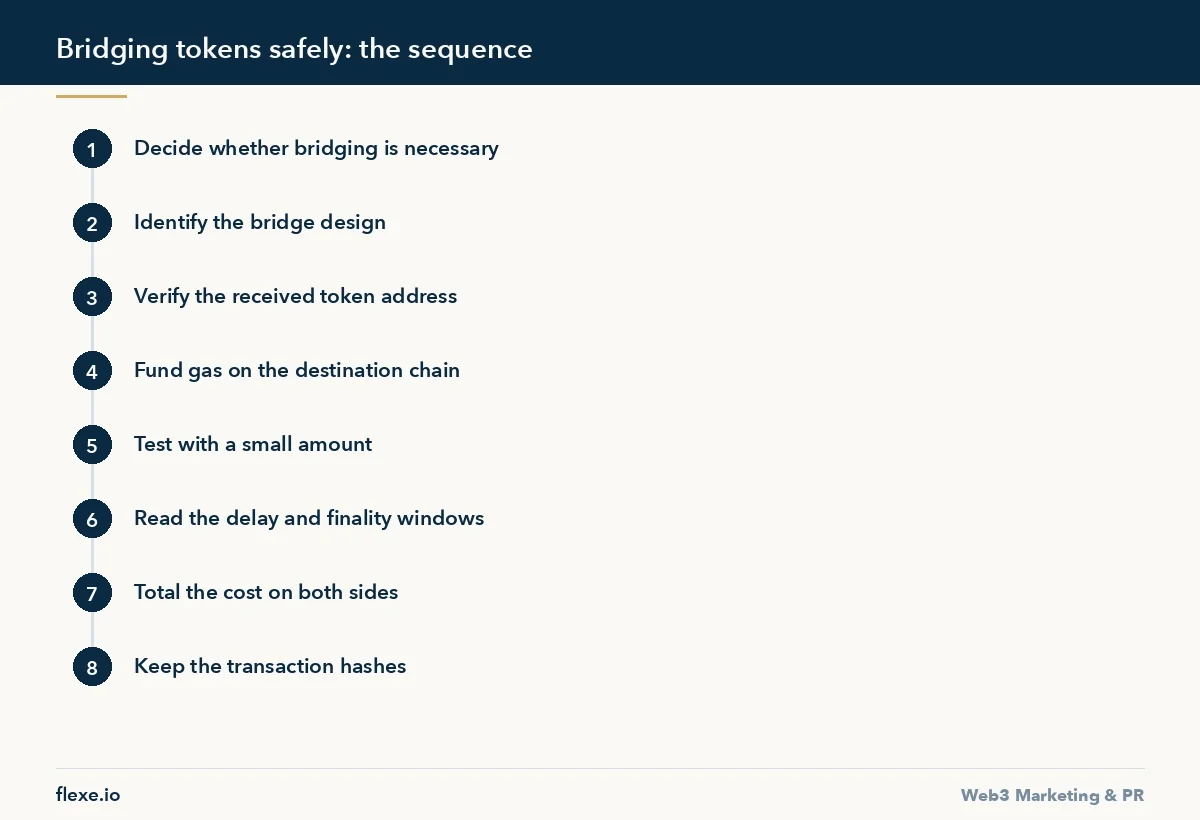
To bridge tokens safely, you first confirm the move needs a bridge at all, then identify the bridge design, verify the exact token address that will arrive, fund gas on the destination chain, test the route with a small amount and keep both transaction hashes. That is how to bridge tokens safely, and the first run on a route takes about fifteen minutes.
Bridging is the step where most self-custody losses happen, because the interface hides how many systems a single click touches and the failure modes are silent: the transaction succeeds, and the asset that arrives is not the one you expected. Once a route is verified, repeating it takes under two minutes.
What you need before you start
Have these ready before the first signature.
- a reason to bridge that is not convenience: the asset or the liquidity lives on only one chain, or you are moving into or out of a position you already hold;
- the contract address the destination chain’s main liquidity uses for the token you want;
- a small amount of the native gas asset on the destination chain, or a route that offers a gas top-up;
- a block explorer for both chains, plus the bridge’s own status page bookmarked;
- a written note where you will record the route, the fee and both hashes.
How to bridge tokens safely step by step
This is the sequence we run before moving anything meaningful across chains.
1. Decide whether you need to bridge at all
Bridging adds a trust assumption that trading does not. If the asset you want exists natively on the chain you already hold funds on, buying it there is strictly safer than bridging to it, even when the quoted cost is slightly worse. The honest reasons to bridge are an asset that lives on one chain, liquidity that lives on one chain, or a position you already hold. Convenience is not one of them.
2. Identify what kind of bridge you are using
Canonical bridges, lock-and-mint third-party bridges and liquidity network bridges dominate, and they fail differently (see the table below). You can usually tell which you have by reading what the destination token is called. If the receive side says anything other than the plain ticker, you are being minted a claim, not handed the asset.
3. Check which token address actually arrives
This is the check that saves people. Copy the contract address of the token you will receive and compare it against the address the destination chain’s main liquidity uses. Several chains have three or four competing versions of the same stablecoin, only one of which trades deeply. Arriving with a wrapped version nobody quotes means bridging back to sell, paying twice and taking the same risk again. The interface will not warn you.
- Check: received contract address against the main pool’s address
- Watch out: wallet labels that show only the ticker
4. Confirm you have gas on the destination chain
A bridge delivers the token you asked for. It does not necessarily deliver the native asset needed to pay for the next transaction, and landing a stablecoin on a chain where you hold zero gas leaves you holding an asset you cannot move. Where a bridge offers a gas top-up in the same flow, take it; otherwise send gas first as a separate, small transfer and confirm it landed before bridging the main amount.
5. Test the route with a small amount
Send an amount you would be relaxed about losing, and watch it all the way through: origin confirmation, relayer pickup, destination mint or payout. Then check the received token in a block explorer rather than trusting the wallet label. The test is the cheapest insurance on this step and shows the real end-to-end time.
- Cost: two sets of fees
- Check: the received token in a block explorer, not the wallet label
6. Read the delay and finality windows
Optimistic designs include a challenge period, commonly measured in days for withdrawals back to the settlement layer. Fast withdrawals exist, but they are a separate service that fronts you liquidity for a fee, with its own counterparty. A position that must be closed inside an hour cannot depend on a route with a multi-day exit.
- Time: minutes on a liquidity route, days on an optimistic withdrawal
- Watch out: fast withdrawal services add their own counterparty
7. Total the cost on both sides
The real cost is origin gas, plus the bridge or relayer fee, plus destination gas, plus any slippage on a liquidity network route. Compare the amount that lands in your wallet against the amount you sent; that difference is the only number that matters. The cheapest aggregator route is not automatically right: it can be cheap precisely because it uses a bridge with weaker assumptions.
8. Keep the transaction hashes
Save the origin hash and, once it exists, the destination hash. Every bridge support process starts by asking for them, and a stalled transfer without a hash is close to unrecoverable. If a transfer stalls, resubmitting it on a different route while the first is pending is how one stuck transfer becomes two.
Keep a written record of verified routes
Once a route has been tested, write it down: the interface used, the bridge type, the exact token address that arrived, the fee actually paid and the end-to-end time observed. The note makes the second crossing a two minute job. A route that used to settle in minutes and now takes hours is information.
Record the failures too, since most stalls repeat in the same conditions, and keep the record outside the wallet and any chat application. Re-test a saved route whenever the bridge or the destination chain ships an upgrade: contract addresses change and a route can be retired quietly.
Bridge types compared
| Route | How it works | Where the risk sits | How it fails |
|---|---|---|---|
| Canonical bridge | Operated by the chain itself; the asset is locked on the origin chain and a native representation is minted on the destination | The chain team and its upgrade process | Through the contracts and upgrades the chain team controls |
| Lock-and-mint third-party bridge | Holds your deposit in a contract and mints a wrapped claim | The bridge contract and its operator | If the contract is drained, the wrapped token is backed by nothing and usually keeps trading for a while |
| Liquidity network bridge | Never mints; pays you out of a pool on the destination chain | Depth of the destination pool | The transfer fails or prices badly when the pool is thin |
| Centralised exchange | Deposit on the origin chain, withdraw on the destination | Custody while funds are in transit | Suspended deposits or withdrawals, uncredited token versions, account restrictions |
Approvals, addresses and wallet hygiene
A bridge usually needs an allowance before it can move a token, and interfaces commonly ask for an unlimited one. Grant the amount of the transfer where the interface allows it, and review outstanding allowances periodically so that bridges you tested once are not left holding permission over a balance indefinitely.
Check the destination address with the same suspicion you apply to the token address. Sending to an exchange deposit address across a chain the exchange does not credit on is a recovery ticket at best, and sending to a contract that cannot forward tokens is usually final. Where the wallet has an address book, send to the saved entry rather than a pasted string.
Keep the signing device separate from the browsing device where amounts justify it, and use a small spending wallet for routine crossings so a hurried mistake is bounded. Treat a message offering help with a pending transfer as an attack: support that contacts you first is the oldest pattern in this category.
What this sequence does not cover
None of it protects against a compromised front end. If the site serving the bridge interface is hijacked, the approval you sign can point anywhere, and every check above will still pass. Search results and ads have carried convincing clones of bridge front ends for years. Bookmark the interfaces, reach them only from the bookmark, compare contract addresses against the project’s published list, and treat any link that reaches you through a message as untrusted.
It also says nothing about whether the destination venue is worth trading on once you arrive. That is a separate assessment, covered in our guide on how to choose a reliable DEX, and the routing side is in the DEX aggregator guide.
When a transfer stalls or partly arrives
Before contacting anyone, establish which leg is stuck. Confirm the origin transaction is finalised rather than merely broadcast, check whether the destination chain is producing blocks, and look for the bridge’s own status page or incident channel. Most stalls are relayer backlogs that clear without intervention, and telling a slow relayer from a paused bridge changes what you do next.
Some designs require a manual claim on the destination side, and a transfer that looks lost is occasionally a claim transaction nobody has signed. Check the bridge interface with the receiving wallet connected, and whether the claim needs gas you do not yet hold on that chain.
When a ticket is genuinely needed, open it in the project’s official channel with both hashes, the amount, the token address and the timestamps, and keep everything in one thread. Do not open parallel tickets, repeat the transfer, or trust a direct message claiming to answer your public ticket. If the design includes a challenge period, the wait is measured in that period and not in minutes, so an interface that appears stuck is often working exactly as designed.
Large transfers and treasury moves
How to bridge tokens safely in size
Split a large amount into tranches rather than sending it in one transaction, confirm each tranche has landed and is spendable before releasing the next, and accept the extra fees as the cost of not discovering a problem with the whole balance in motion. Liquidity network routes price worse as size grows.
Moving size during a volatile hour, an upgrade window on either chain, or right after a bridge has resumed from a pause puts your transfer in the same queue as everyone else’s. Have a plan for the funds on arrival: which venue the asset will be used at, whether that venue quotes the exact token version that arrives, and whether you hold gas for the first transaction.
Bridging for a team or a treasury
Treasury movements need a rule rather than a judgement call. Agree which routes are approved, who may initiate a transfer, what size requires a second signer, and where the record is kept. A route with a challenge period plus a signer in another time zone can turn an afternoon transfer into a two day process nobody planned for. Do a rehearsal with the full approval chain first, using an amount the team would shrug at, and keep a row per transfer with both hashes and both fees so reconciliation stays dull.
Bridge or exchange: which route to use
A centralised exchange is a route as well, and occasionally the better one. Depositing on the origin chain and withdrawing on the destination avoids bridge contract risk entirely, at the cost of custody while the funds are in transit and whatever the withdrawal fee happens to be. For well supported assets, that trade is often favourable, particularly for size or for a chain whose bridges are young.
The opposite case is just as real. Exchanges suspend deposits and withdrawals with little notice, credit only the token version they recognise, and an account restriction turns a routine movement into a support queue. Confirm the exchange credits the network you send on, and treat the first transfer on a new pairing as a test.
Common mistakes
- receiving a wrapped token version that nothing on the destination chain quotes, then paying to bridge back;
- landing a token on a chain where you hold zero gas;
- sending the full amount without a small test first;
- picking the cheapest aggregator route without asking why it is cheap;
- resubmitting a stalled transfer on another route while the first is still pending.
How long it takes and what it costs
Running the checks for how to bridge tokens safely takes about fifteen minutes the first time on a route and under two minutes afterwards. The transfer settles in minutes on a liquidity network route; an optimistic withdrawal to the settlement layer takes days unless a fast withdrawal service fronts the liquidity.
Cost is origin gas, the bridge or relayer fee, destination gas and any slippage. The test adds two sets of fees, and tranching adds more. For projects that need users to reach a token on a specific chain without losing them at this step, the onboarding side is covered on our crypto traffic acquisition page.
Frequently Asked Questions
What is the most common way people lose money bridging?
Receiving a wrapped version of a token that nothing on the destination chain quotes. The transfer succeeds, so no warning appears, and selling then requires bridging back and paying the cost and the risk a second time. Comparing the received contract address with the one the main pool uses before sending prevents it.
Is a canonical bridge safer than a third-party one?
Usually, because it removes one independent operator from the chain of trust. It does not remove risk entirely: the chain team still controls the contracts and the upgrade process behind it. A lock-and-mint third-party bridge adds a contract that, if drained, leaves the wrapped token backed by nothing.
Why did my bridged tokens arrive but I cannot move them?
You have no native gas asset on the destination chain. Bridges deliver the token you requested, not the currency needed to pay for the next transaction. Take the gas top-up option where the bridge offers one, or send a small amount of gas separately and confirm it landed before moving size.
How long should a bridge transfer take?
Liquidity network routes usually settle in minutes. Optimistic rollup withdrawals to the settlement layer include a challenge period measured in days unless you pay a third party to front the liquidity. A small test transfer shows the real end-to-end time on your route, which often differs from the estimate shown.
What should I do if a bridge transfer is stuck?
Check the bridge status page and whether the destination chain is producing blocks, then look for an unsigned claim on the destination side. If a ticket is needed, open one in the official channel with both hashes. Do not resubmit the same transfer through another route while the first is pending.