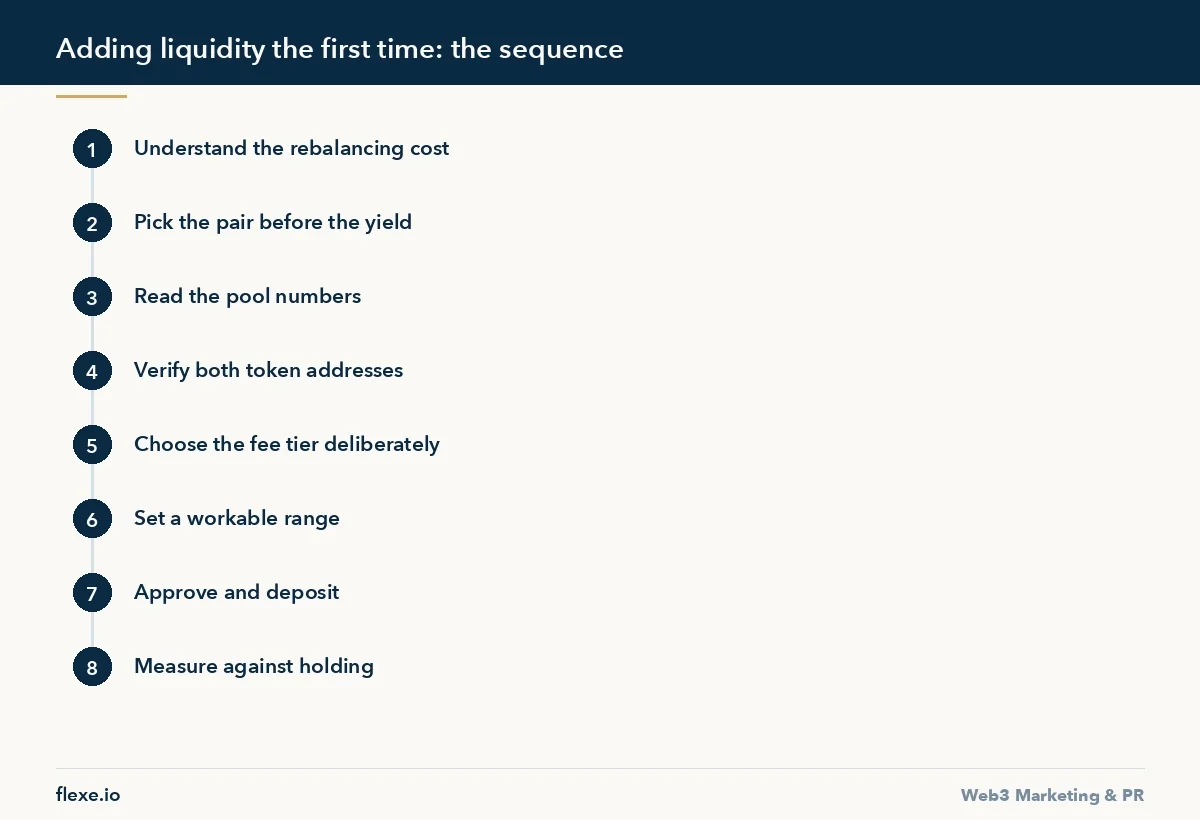
To add liquidity to a pool for the first time, you connect a funded wallet, pick a correlated pair, verify both token addresses, match the fee tier to the pool’s volume, set a wide range if the pool is concentrated, enter the amounts, approve and deposit, then measure the position against simply holding the two tokens. It looks like depositing into a savings product and behaves like taking a position.
You are quoting a two-sided market with your own money, and the pool rebalances you into whichever asset is falling. The fee income is real, and so is that cost. The steps below cover what to check before the deposit, what the numbers on screen actually mean, and how to tell after two weeks whether the position is working.
What you need before you start
- A wallet funded with the chain’s native asset for gas, with a margin beyond the estimate.
- Both tokens of the pair, with addresses taken from the project’s own documentation or a major tracker.
- The pool page open through the exchange’s own interface, not a link somebody sent you.
- Ideally a separate wallet for the position, to keep accounting clean and limit what a bad approval can reach.
- A place to record the amount and price of each token on the day you deposit.
How to add liquidity to a pool step by step
A pool holds both sides of a pair. When the market price moves, arbitrage traders buy the cheap side out of your pool and leave the other, so you end up holding more of whichever asset went down. Against simply holding the two tokens, that difference is the loss the position has to earn back through fees. It is only realised when you withdraw, and if the price returns to where it started, it disappears. That is why the effect is small on pairs that track each other and large on a volatile token quoted against a stablecoin.
1. Connect the wallet and open the liquidity page
Connect the wallet you set aside for this position and open the liquidity page through the exchange’s own interface, not a link somebody sent you. Fund the wallet with the native asset before anything else. A deposit that runs out of gas between the approval and the deposit leaves an allowance granted and no position created, which is harmless but easy to mistake for lost money. Confirm the address bar before signing: fake pool pages are a standard piece of phishing, and if a page asks for a signature that is neither an approval nor a deposit, stop and read it.
2. Select the token pair before you pick the yield
Sorting pools by advertised yield selects for the pools most likely to lose you money, because a high headline rate on a volatile pair is compensation for exactly that risk, often paid in a token whose price is falling. For a first position, correlated pairs are the honest starting point: two stablecoins, or a staked asset against its underlying. The mechanics are the same and the price drift is small enough to learn the process without the price move dominating the outcome. Our stablecoin liquidity pool guide covers that case in detail.
3. Verify both token addresses
Anyone can create a pool for any two contracts, including a copy of a real token. Deposit into the wrong one and there is no error, just a position nobody will ever trade against. Take both addresses from the project’s own documentation or a major tracker and compare them character by character against what the pool page shows.
Time: thirty seconds, and it is the single check most first-time providers skip.
4. Read the pool, then choose the fee tier
Open the pool page and read four things: total value locked, volume over the last week, the fee tier, and how concentrated the existing positions are. Fee income is a function of volume divided by liquidity, not of liquidity alone. A large pool with no volume pays nothing. A small pool with steady volume can pay well and will also move against you faster.
Most modern exchanges run several tiers on the same pair. The low tier is where stable pairs trade because the spread has to be tight. The higher tiers exist because volatile pairs need to pay providers more to be worth quoting. Putting a stable pair in a high tier means routers will skip you. Putting a volatile pair in the lowest tier means you take the risk and get underpaid for it. Look at where the existing volume already sits and match it.
Check: the ratio of weekly volume to liquidity is the number worth writing down.
5. Set the price range if the pool is concentrated
Concentrated pools let you specify the price band your capital works in. Inside it you earn a larger share of fees for the same deposit. Outside it you earn nothing and sit entirely in one asset. A narrow band is not a better position, it is a more active one that needs rebalancing and pays gas each time. For a first deposit, set a range wide enough that ordinary weekly movement does not push you out of it, and treat tight ranges as a strategy to graduate to.
6. Enter the amounts and read the preview
Interfaces deposit in the ratio the pool currently holds, not the ratio you typed in. If your two amounts do not match that ratio, part of one side comes back to you, or the interface swaps it at the pool’s current price, which costs a fee and moves the price slightly against you. On a concentrated position a narrow band can mean most of one token is simply refunded. Read the preview: any difference between what is being deposited and what you intended is your first sign that the range or the ratio needs adjusting.
Set the slippage tolerance for that internal swap yourself rather than accepting a wide default. A deposit is not urgent, so a tight tolerance that fails and asks you to retry costs a little gas and protects you from a poor execution during a volatile minute. Where the chain is cheap enough, deposit a small amount first: watching one small position appear, accrue a fee, drift out of balance and be withdrawn teaches more about the interface than any amount of reading.
7. Approve and confirm the deposit
You will sign two transactions per token: an approval, then the deposit itself. Approve the exact amount rather than an unlimited allowance where the interface offers the choice. After confirmation you receive a position token, either a fungible pool token or a position identifier. That token is the claim on your deposit. Losing access to it means losing the position, and sending it away is the same as sending away the underlying.
Have a plan for the position token before you receive it. If it is a transferable identifier, keep it wherever you keep your other valuable holdings, not in a browser wallet you use for testing. Anyone holding that token can withdraw the deposit behind it, and no support process exists to recover it.
8. Measure the position against holding
Record three numbers on the day you deposit: the amount of each token, and the price of each. Two weeks later, compare the withdrawable value plus accrued fees against what those same tokens would be worth untouched.
That single comparison answers the only real question. Advertised yield, dashboard cards and reward token balances do not, because they exclude the rebalancing cost by construction.
Pool choices for a first deposit
| Choice | Fee tier to match | Price drift | Upkeep | Fit for a first position |
|---|---|---|---|---|
| Two stablecoins | Low tier | Small | Low | Yes, the honest starting point |
| Staked asset against its underlying | Where existing volume sits | Small | Low | Yes |
| Volatile token against a stablecoin | Higher tier | Large | Medium | Only after a correlated pair |
| Concentrated, wide range | Match the pair | As the pair | Occasional | Yes, if ordinary weekly movement stays inside |
| Concentrated, narrow range | Match the pair | As the pair | Frequent rebalancing, gas each time | No, a strategy to graduate to |
Managing the position after the deposit
Reading the position a week later
A week in, read four figures: the current value of both tokens, the fees accrued but not yet claimed, whether the position is still inside its range, and how total liquidity in the pool has changed. The last one matters more than it looks, because new capital dilutes your share of the same fees. Compare against the figures you recorded at deposit rather than the interface’s return estimate, which usually annualises a recent window, flatters a good week, hides a bad one and rarely subtracts the rebalancing cost.
If the pool runs an incentive programme, check what share of the advertised return comes from it and when it ends, since the end date is usually published somewhere other than the deposit screen. Check also that the pool has not been superseded: exchanges deploy new versions and move incentives onto them, and nothing in the interface necessarily tells you that the activity has gone.
What to do when price leaves range
A concentrated position that leaves its range stops earning and sits entirely in one asset, typically the one that just fell. Nothing is lost at that moment, and doing nothing is a legitimate choice if you expect the price to come back. Withdrawing and redepositing around the new price restarts the fee income, pays gas twice, resets your entry prices and realises the price drift. Widening the range does the same in one step but earns less per unit of capital afterwards. Decide which you will do before it happens, and set a rebalancing budget: wider bands and fewer adjustments usually win on anything other than a very cheap network.
Claiming rewards and compounding them back
Reward tokens usually accrue separately and need a claim transaction of their own, which people forget for months at a time. Claim on a schedule that makes sense against the gas cost, and check whether rewards stop when a programme ends, because incentive schedules expire without warning. Compounding back is a second deposit with the same costs and ratio rules as the first, worth doing only when the claim is large relative to the gas.
Keeping records for the tax year
Every one of these transactions may be a taxable event depending on where you live: the deposit, each claim, each compound and the final withdrawal. Keep the pool address, the position identifier, the deposit date and the two opening prices in one record with the exported transaction history. Note the reason you entered as well: a position opened to learn the mechanics and one opened to earn on idle stablecoins deserve different answers when the pool has a bad month.
Common mistakes
- Sorting pools by advertised yield and starting with a volatile pair.
- Skipping the character-by-character check of both token addresses.
- Putting a stable pair in a high fee tier, or a volatile pair in the lowest one.
- Choosing a narrow range on a first deposit and paying gas on every rebalance.
- Judging the position by the dashboard yield instead of against simply holding the tokens.
How long it takes and what it costs
The deposit itself takes around thirty minutes the first time, including the address check, which alone is thirty seconds. The real test comes two weeks later, when you compare the position against holding. Every step needed to add liquidity to a pool is a transaction: two approvals, the deposit, any later claim and the eventual withdrawal. On a busy chain that sequence can cost more than a small position earns in a month, which makes the chain and the size of the first deposit a single decision.
Work out the round trip before you commit. Add up the approvals, the deposit, any claim and the withdrawal at current rates, compare that against the fee income the pool has actually paid per unit of liquidity over the last week, and you have the number of weeks the position has to survive to break even on execution costs. That is the argument for a first deposit on a cheaper chain even when the pool is smaller. Check too whether the front end takes a share of the deposit or of the claim, which is rarely shown in the confirmation dialog and on a cheap chain changes the break-even more than gas does.
When to withdraw
Three signals justify closing: volume in the pool has fallen and the fee income no longer covers the price drift, the reward token that made the yield attractive has stopped being worth selling, or the pair has stopped being correlated in the way you assumed when you entered. Withdrawal returns whatever mix the pool holds at that moment, which will not match your deposit ratio, so check what you are receiving before confirming, and remember that claiming rewards is frequently a separate transaction.
For token teams, the same mechanics decide whether a new pool is tradeable at all on day one. Setting up that side is covered in how to list a token on a DEX, and the traffic that makes a pool worth having is on our crypto traffic acquisition page.
The same steps apply on most Uniswap v3 clones, which we compare by network, TVL and fee tiers.
Frequently Asked Questions
Is providing liquidity the same as earning interest?
No. Providing liquidity means quoting a two-sided market with your own capital. Fees accrue, but the pool also rebalances you into whichever asset is falling, and that cost is not shown in the advertised yield. It is realised only when you withdraw.
Which pool should a first-time provider use?
A first-time provider should use a correlated pair, such as two stablecoins or a staked asset against its underlying. The mechanics are identical to any other pool, but the price drift is small enough to learn the process safely without the price move dominating the outcome.
Why does my position show only one token now?
Your position shows one token because price has moved outside your chosen range in a concentrated pool. Capital outside the band earns no fees and sits entirely in one asset, usually the one that fell, until price returns or you reset or widen the range.
How do I know whether the position is actually profitable?
Compare the withdrawable value plus claimed fees against the value the same two tokens would have if you had simply held them. Record amounts and prices on the day you deposit. Dashboard yield figures exclude the rebalancing cost by construction, so they cannot answer this.
Can I lose everything in a liquidity pool?
Yes, through contract failure, a malicious or copied token contract, or one side of the pair going to zero. Verifying both token addresses and the pool contract before depositing removes the most common cases, and a separate wallet limits what a bad approval can reach.