If you plan to list a token on a DEX, know that it is not an application. There is no committee, no queue and nobody to email. On most DEXs anyone can create a pool for any token in a few minutes, which means the listing itself is the easy part and everything that decides whether the listing is usable happens before and after it.
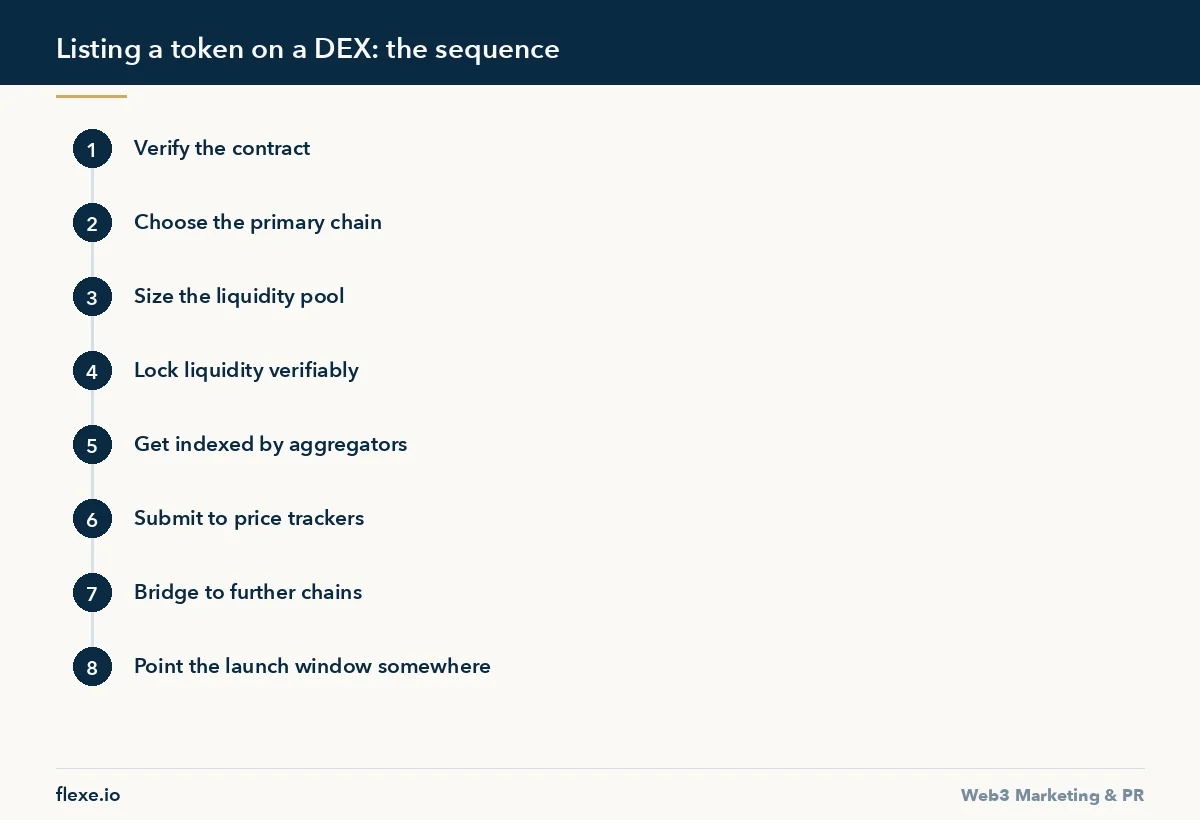
The sequence below is how we list a token on a DEX, in the order we run it. Doing these steps out of order is the most common reason a token is technically listed and practically invisible.
1. Before you list a token on a DEX, verify the contract
Publish and verify the source code on the block explorer for every chain you intend to deploy on. Unverified contracts are flagged by wallets, skipped by aggregators and treated as a risk signal by every scanner a trader is likely to run before buying.
Verification is also what makes the rest of the process cheap. Trackers, aggregators and listing forms all read the same explorer page. If it is missing, you will be answering the same question by hand in every submission.
2. Decide the chain order, do not deploy everywhere at once
Multi-chain deployment splits liquidity, and split liquidity produces slippage on every chain instead of depth on one. Pick the chain where your buyers already are, establish a pool that can absorb a realistic trade, and only then bridge outward.
Choose the primary chain on where the audience trades rather than on gas costs. A cheaper chain with no buyers is a more expensive mistake than a costlier chain with them.
3. Size the pool against the trade you expect, not the budget you have
The number that matters is price impact on a realistic buy. Decide the largest single trade you want to absorb without moving the price by more than a few percent, then size the pool to that. A pool that cannot take a mid-sized buy without a double-digit move will show up in every aggregator as a bad route, and the aggregator will send the trade elsewhere.
Pair selection matters as much as depth. A pair against a major stablecoin or the chain’s native asset routes cleanly. An exotic pair forces multi-hop routing, which raises slippage on every trade and makes the token look worse than it is.
4. Lock liquidity and make the lock checkable
Locked liquidity is the single claim buyers verify most often, and the only version of it that counts is one they can confirm themselves on chain. Publish the lock transaction and the unlock date in the same place as the contract address.
The same applies to admin controls. If the contract retains a mint function or an owner privilege, say so and explain the constraint, because scanners will surface it whether you mention it or not. A disclosed privilege reads as a design decision, an undisclosed one reads as a trap.
5. Get indexed by the aggregators
Most DEX volume does not arrive through the exchange interface. It arrives through aggregators that route a trade across whichever pool offers the best execution. Until your pool is indexed, it is invisible to that flow no matter how deep it is.
Indexing is usually automatic once a pool has enough liquidity and trade history, but the token metadata is not. Submit the logo, name and decimals to the token list your chain’s aggregators read. A token that shows as an unnamed address in a routing interface converts poorly for the obvious reason.
6. Submit to the price trackers
Trackers are where a new token stops being an address and starts being an asset people can search for. They require a live pool with genuine trade history, so this step cannot be brought forward. Prepare the submission material in advance: contract addresses per chain, the pool links, supply breakdown, team information and the social channels you actually maintain.
Our documented inventory of the trackers and exchanges worth submitting to, with what each one requires, is on the exchange and tracker listing page.
7. Bridge outward only once the first pool holds
Cross-chain expansion is a supply problem before it is a marketing problem. Decide whether the second chain gets a bridged representation of the same supply or a natively issued one, because the two behave differently when the bridge is congested or paused, and holders will ask.
Whichever you choose, publish which bridge is canonical. Most cross-chain confusion, and a good share of the scam reports that follow a multi-chain launch, comes from holders finding an unofficial wrapped version and not knowing it is not yours.
8. Give the launch somewhere to point
The listing produces a window of attention measured in days. What converts it is having one page that answers the three questions every prospective buyer asks: which contract is real, where the liquidity is and who is behind it. Scattering that across a Telegram pin, a thread and a docs site loses most of the traffic.
Paid distribution during that window works because the intent is already there. How we run it across explorers and crypto media is documented on our crypto traffic acquisition page.
Set the opening price on purpose
The ratio you deposit sets the opening price, and there is no separate field for it anywhere in the interface. Work backwards: decide the price you want the first trade to happen at, then compute the two amounts that produce it at the depth you have chosen. Getting this wrong is not cosmetic, because the first buyer takes the difference.
Sanity check the result against whatever price the token already has elsewhere, whether that is a private round, another chain, an over-the-counter sale or a centralised pair. A pool that opens far below an existing reference is arbitraged within a block or two, and one that opens far above simply does not trade while everyone waits for it to come down to something reasonable.
Decide too what share of supply the pool holds. A pool holding a small fraction of a large supply prices thinly and invites the argument that the float is manufactured, while a pool holding almost all of it leaves nothing for the next venue. Publish the number either way, because anyone can derive it from the chain and someone will.
Prepare the wallets before launch day
Separate the deployer wallet, the treasury wallet, the wallet that pays for launch-day transactions and the wallet that will hold the position before launch day, and fund each with enough of the native asset for several transactions rather than exactly one. Running out of gas halfway through creating a pool leaves the pool in a state you then have to explain to whoever is watching the address.
Put the position under a multisig if more than one person is responsible for it. The wallet holding the pool position controls the liquidity, and a single key on somebody laptop is both a security problem and a governance one. Publish which address holds it, because holders will look for that address whether or not you point them at it.
Revoke the approvals granted during setup once the pool is live. Deployment and testing usually leave a trail of allowances on routers and helper contracts, and an unlimited allowance sitting on a treasury wallet is an avoidable risk that any scanner will surface to the people reading your token page before deciding whether to buy.
Rehearse the whole sequence on a test network, or with a token of your own on the same chain. Pool creation, the approvals and the lock all behave the same way there, and finding out that a step needs a parameter you did not expect costs nothing in rehearsal and costs you the launch window in production.
Opening the pool without feeding bots
Automated traders watch pending transactions for new pools and will buy in the first block if the pool looks worth buying. That is not automatically harmful, but it becomes harmful when the buy is large relative to your depth and the matching sell arrives an hour later into a pool that is now shallower than it was.
The defences are ordinary. Submit the pool creation through a private transaction relay where your chain offers one, so the transaction does not sit in a public queue advertising itself. Add the full depth in the same transaction or immediately afterwards, rather than seeding a small amount and returning later, which leaves a window where the price can be moved cheaply.
Announce after the pool holds, not before. A published launch time tells every automated participant exactly when to watch, while the traffic you actually want, people who read the announcement and then decide to buy, arrives over hours and days rather than in a single block at a moment you advertised in advance.
Watch the first buys for addresses funded from the same source as each other. A cluster like that is usually one participant wearing several hats, and spotting it early stops you reading a coordinated entry as organic demand and then sizing everything that follows against a number that was never real.
Budgeting to list a token on a DEX
Costs fall into groups that teams budget for unevenly. The visible ones are gas for deployment, verification, the approvals and pool creation, plus the capital that sits in the pool itself, which is not spent but is not available either. The less visible ones are the audit, the lock service fee where one is charged, the metadata work for the token lists and the hours spent preparing tracker submissions.
Treat the pool capital as committed rather than recoverable. Withdrawing depth in the first weeks to cover an unexpected cost is among the most damaging things a team can do to a new listing, because it is visible on chain, it widens every quote the aggregators see, and holders read it exactly as it appears.
Keep a reserve for the second pool as well. The chain you launch on may not be the chain your buyers end up on, and discovering that with no capital left to seed a second pool means either splitting the first one, which helps nobody, or waiting until the moment has passed and the attention has gone elsewhere.
Track what you spend against what the listing produced. Gas, audit, lock and submission costs are easy to record at the time and awkward to reconstruct months later, and the total is the figure you need when deciding whether a second chain is worth the same outlay over again.
Watch the first hours, not the chart
In the first hours the useful information is not the price. Watch whether trades are routing through aggregators or only through the exchange interface, whether buys and sells are arriving from distinct addresses or from the same few, how far the pool has drifted from the ratio you originally deposited into it, and whether the sells are coming from addresses that bought in the first block.
Set an alert on the pool address so that you learn about a large trade from a notification rather than from a message in your own channel. Most chains have free monitoring services that will do this, and knowing about a sizeable sell before your holders do is the difference between answering a question and reacting to a rumour.
Write down what normal looks like by the end of the first week: the typical trade size, the daily count, the depth you are holding, the share arriving through aggregators. Those figures are what you compare against later when someone claims the token is being dumped, and they are also the numbers a tracker or a centralised exchange will eventually ask you to provide.
Copycat pools and impersonation after launch
Anyone can create a second pool for a token that is not theirs, and someone will. Expect a deployment of a contract carrying your name on another chain, an extra pool quoted against a different asset, a social account using your logo, and a wallet posting the wrong address in your own community within days of attracting any attention at all.
The counter is a single page you control listing the real contract address per chain, the canonical pool, the lock transaction and the date it expires, plus the habit of pointing at that page rather than retyping addresses in chat. Ask the aggregators and trackers to flag the clone once it appears, and pin the real address where new arrivals land instead of where long-time holders already are.
Submit your own metadata to the scanners and reputation services rather than waiting to be scored. Most of them read the explorer and the pool automatically, but the logo, the social links and the contact address usually need submitting by hand, and a token page with blanks on it reads worse than the same page filled in.
When the pool opens at the wrong price
If the pool opens badly, the cheapest response is usually to trade it back rather than to withdraw. Buying or selling into your own pool moves the price at a cost you can calculate beforehand, and it leaves the position and the trade history intact, which matters because trackers and aggregators both read that history when they assess you.
Withdrawing and recreating is the last resort. It resets the age of the pool, it looks to any observer exactly like an exit, and it destroys the trade record you need for the tracker submissions later. If you do it anyway, publish the reason and the transaction before anyone asks, and expect to answer the question regardless.
Whatever you do, do it from an address you are willing to have identified. Every trade a team makes in its own pool is visible and will be attributed to you sooner or later, so a correction made openly costs less than the same correction found by somebody else and posted as evidence of manipulation.
If you are weighing the two venues, read our breakdown of marketing a DEX listing against a CEX listing and the promotion work each listing needs.
What this sequence cannot do
- Guarantee tracker approval. Trackers reject submissions with thin trade history and give no appeal.
- Create volume. A listing makes a token buyable, it does not make anyone want it.
- Guarantee aggregator routing. Routing follows execution quality, and a shallow pool loses to a deeper one every time.
- Substitute for a centralised listing. DEX presence and CEX listing serve different buyers and neither replaces the other.