To verify a token contract, you record the exact build settings at deployment, submit the source through your development framework with correctly encoded constructor arguments, and then repeat the job for every proxy, every implementation and every chain. That is how to verify a token contract in one line: publish the source so anyone can compile it and confirm it produces the bytecode already deployed on chain.
Until that happens, the only honest description of your token is a blob of machine code that nobody outside the team can read. Every explorer supports verification, most trackers require it, and it is the first thing a careful buyer checks. It takes about fifteen minutes when the build settings are known and considerably longer when they are not.
What you need before you start
Verification succeeds when the compiler reproduces the deployed bytecode exactly. Gather these before opening any explorer:
- Compiler settings: the identical compiler version down to the patch number, the optimiser setting (on or off), the optimiser run count and the target EVM version.
- Source files: the same source files that were compiled, ideally the exact tagged commit and the standard JSON input from the build artefacts.
- Constructor arguments: in ABI-encoded form, as they were appended to the deployment bytecode.
- Library addresses: the deployed addresses of any external libraries the contract links to.
- An address list: every deployment address by chain, including proxies and implementations.
How to verify a token contract step by step
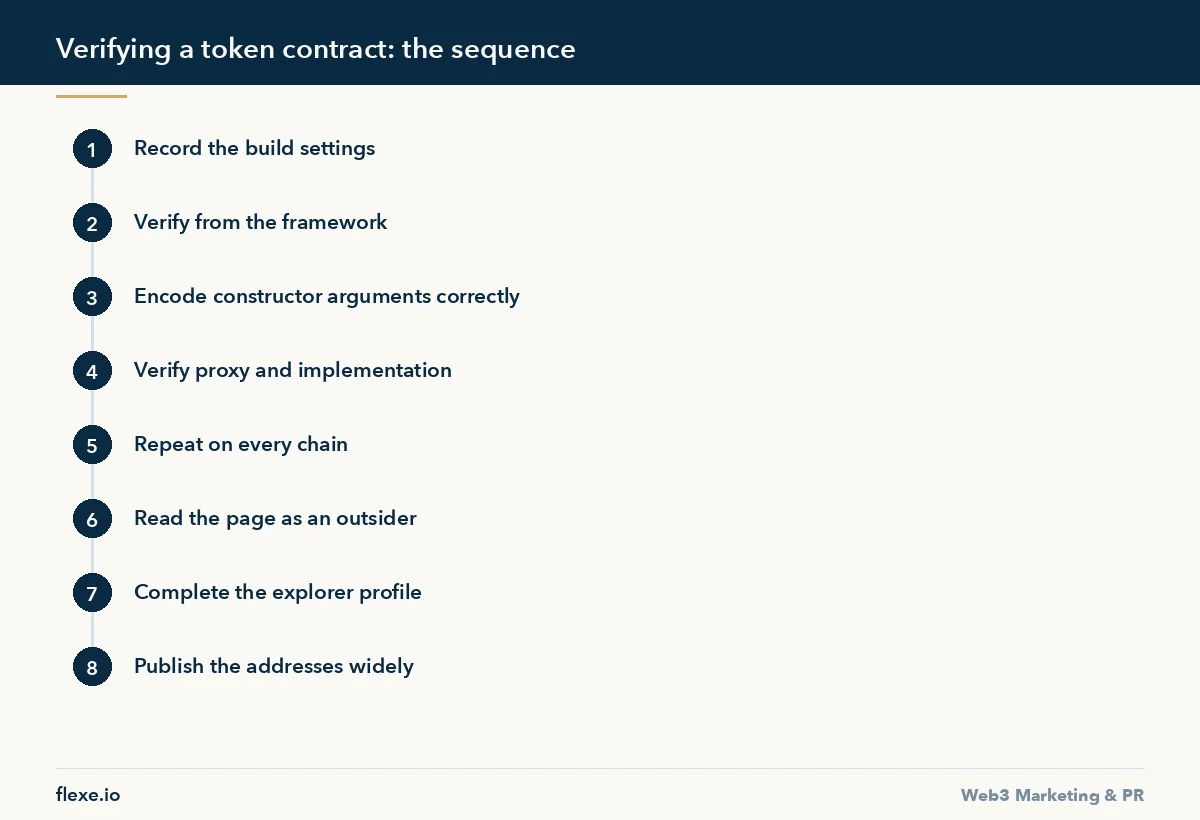
1. Record the build settings at deployment
Write down the compiler version, optimiser setting and optimiser run count, plus the source files and the constructor arguments, at deploy time. Reconstructing them afterwards is the single largest source of failed verification, and a difference of one optimiser run produces different bytecode and a rejection with no useful error message.
- Time: minutes at deployment, against a slow reconstruction later.
- Check: the settings are written into the repository next to the addresses.
2. Verify from the framework, not the web form
Modern development frameworks include a verification command that reads the build artefacts and submits everything in the right shape. It handles multi-file projects, library links and constructor encoding without manual assembly. The manual form on an explorer is a fallback for contracts deployed before the project had a working build setup. Use it when you must, and expect to flatten the source and encode the constructor arguments yourself.
- Check: the submission uses the original multi-file input, not a hand-flattened copy.
- Fallback: the explorer web form, with flattened source and manually encoded arguments.
3. Get the constructor arguments right
Constructor arguments are appended to the deployment bytecode in ABI-encoded form. If your contract took any parameters at deployment, the explorer needs them exactly as encoded, not as the human-readable values you passed. They can be read off the end of the deployment transaction input data. Most verification failures on otherwise correct submissions come down to this field.
- Where to find them: the tail of the deployment transaction input data.
- Check: the encoded string, not the readable values, went into the form.
4. Handle proxies as two contracts
An upgradeable token is a proxy contract that delegates to an implementation contract. Verifying only the proxy shows a reader a few lines of forwarding logic and none of the actual token behaviour. Verify both, then use the explorer’s option to mark the proxy as such so the interface reads the implementation. Do it again after every upgrade, because a new implementation is a new unverified contract.
- Check: the read and write tabs on the proxy page show the token functions.
- Repeat: after every upgrade.
5. Repeat on every chain
Verification is per explorer and per deployment. A token verified on its home chain is unverified on every chain it has been bridged or redeployed to, and each chain’s main explorer maintains its own record. Keep a list of every deployment address by chain and check them all. Multi-chain projects routinely have one verified contract and three that nobody remembered, which is exactly what a suspicious buyer finds.
- Check: every address on the list opens to verified source.
- Owner: one person holds the list.
6. Read the page a stranger will see
Once verified, open the contract page as an outsider. Check that the source is readable rather than a single flattened wall, that the functions have names that describe what they do, and that anything alarming is explained somewhere public. Functions that pause transfers, blacklist addresses, mint new supply or change fees are not automatically wrong, and several have legitimate uses. But they are the ones people look for, so a project that does not explain them is letting someone else write the explanation.
- Check: pause, blacklist, mint and fee functions each have a public explanation.
- Browser: no wallet connected, no team account signed in.
7. Complete the explorer profile
Verification opens up the token information form: logo, official website, social links, contact email and a short description. Filling it removes the generic placeholder that makes a legitimate token look abandoned. It also matters downstream. Trackers and exchanges read the explorer page during review, and a complete profile is one fewer question in the queue. The tracker requirements themselves are in how to get listed on CoinGecko and CoinMarketCap.
- Fields: logo, website, social links, contact email, description.
- Check: the placeholder is gone and every link resolves.
8. Publish the addresses where people look
The verified address belongs on your own site, in the documentation, in the pinned message of every community channel and on the tokenomics page. Contract address confusion is the mechanism behind most copy-token losses, and the fix is availability rather than warnings.
List every chain and every address in one place, and keep that page current. What that page should contain is covered in how to prepare a tokenomics page.
When verification keeps failing
A rejection with no useful message is nearly always a build mismatch rather than a bad contract. Work through the settings in order: the compiler version down to the patch number, the optimiser on or off, the run count, and the target EVM version. One of those four is wrong in most failures, and the quickest way to find out which is to compile locally and compare the produced bytecode against what the chain holds.
| Cause | What you see | Fix |
|---|---|---|
| Compiler version, optimiser setting, run count or EVM version differs | Rejection with no useful error message | Compile locally and compare the bytecode against the chain, then correct the setting |
| Constructor arguments passed as readable values | Otherwise correct submission rejected | Read the ABI-encoded arguments off the end of the deployment transaction input data |
| External library addresses missing | Bytecode mismatch | Supply the deployed library addresses the compiler wrote into the bytecode |
| Flattened file problems | Compile errors or mismatch | Remove repeated licence identifiers, duplicated imports, stale remappings and a stale pragma, or submit the multi-file input |
| Source differs from the deployed copy | Everything matches except the final bytes | Check out the exact commit rather than retyping the file |
| Chain-side issue | Fails on one chain, succeeds on others | Wait for full transaction history, check the key and the single-file limit |
The compiler also appends a hash of the build inputs to the end of the runtime bytecode, so a file differing only in a comment or a line ending produces a different tail. And some chains reject a submission for reasons unconnected to the build: slow indexing, a rate-limited key, or an interface accepting only a single file. If the settings are lost entirely, the recovery path is patient brute force: try the plausible compiler versions with the optimiser on and off, then vary the run count.
Keep the build reproducible after launch and after upgrades
Treat the deployment as something you will have to recreate a year later, because at some point you will. Pin the compiler version in the project configuration rather than accepting whatever happens to be installed, commit the lock file, and tag the commit that produced the deployment. A repository whose head has moved on twenty commits is not evidence of anything, and reviewers ask for the commit rather than the branch.
Keep the build artefacts themselves. The standard JSON input the compiler consumed, the produced bytecode, the deployment transaction hash and the address belong in one folder per chain, stored somewhere that survives a laptop. Write the settings into the repository as a short record sitting next to the addresses: chain, address, deployment transaction, compiler version, optimiser setting and run count, and the commit hash.
How to verify a token contract after upgrades
Every upgrade produces a new implementation address that nobody has verified yet. Build the step into the release procedure: deploy, verify the implementation, confirm the explorer still reads the proxy correctly, then announce. Doing it in the other order leaves a window in which the live logic is unreadable, and that window is exactly when the most careful people are looking at the contract.
Check what the explorer shows after the upgrade rather than assuming the link held. The proxy should still resolve to the current implementation, the read and write tabs should expose the functions users expect, and the old implementation stays on the chain and stays verified as a record of what ran before.
What to require from a deployer
When an outside developer deploys the token, verification belongs in the deliverables and in the payment terms rather than in a follow-up request. Ask for the repository, the exact build settings, the deployment addresses per chain and the transaction hashes, and make the final payment conditional on a verified contract page rather than on a working token.
Settle key custody in the same conversation. Who holds the deployer key, whether ownership has moved to a multisig, and what happens to the key when the engagement ends are questions with a clear answer at the start of a project and a very unclear one after a dispute. A clause transferring ownership on final payment saves an expensive argument later.
Common mistakes
Multi-chain deployments fail in predictable ways, and most of them repeat from one project to the next:
- The second chain gets deployed by a different person with a different toolchain, so the settings differ.
- A bridged representation is treated as the same contract while the explorer sees a separate unverified one.
- A test deployment from an early experiment stays visible forever and gets found.
- The address list on the site lags a chain behind, so the newest deployment is the one nobody can read.
- Only the proxy is verified, so readers see forwarding logic and none of the token behaviour.
The defence is one list, owned by one person, holding every chain, every address, its verification state and the date it was last checked. Review it whenever a deployment happens and once a quarter regardless. That list is also what gets pasted into applications, pinned messages and documentation, which stops four slightly different versions circulating at once.
After the page goes live, open every address from a browser with no wallet connected. Confirm the source is visible, the token profile is filled, the supply matches what you publish elsewhere, and the holder list looks like what you expect. Search the explorer for your token name and symbol too, because copies carrying the same symbol are cheap to deploy.
How long it takes and what it costs
Verification takes about fifteen minutes when the build settings are known and considerably longer when the person who deployed is unreachable and the build cannot be reproduced. Projects discover which case they are in during the week of a listing, which is the worst possible moment to find out. The real cost is time, and it grows with every chain, every upgrade and every setting nobody wrote down.
Trackers and exchanges open the contract page during review, and an unverified address is the sort of item that sends an application back to the end of a queue. Verify before applying rather than while a reviewer is looking, and verify on every chain named in the application.
Set a reminder to repeat the outside check after any event that changes the token: a new chain, a migration, a bridge deployment or an upgrade. Verification state is not a permanent property of a project, it is a property of each address, and a contract verified two years ago on a chain nobody thinks about any more is still part of what a careful buyer sees.
What verification proves and what it does not
It proves the published source matches the deployed bytecode. It says nothing about whether the code is safe, whether the logic is sound, or whether the owner can drain the contract. A verified contract with an unrestricted mint function is verified and dangerous at once.
It is a precondition for review, not a substitute for one. An audit assesses the code, verification only makes the code visible, and readers who conflate the two are the ones who get hurt. For projects treating this as part of a launch, the visibility side of an audited and verified contract is covered on our crypto traffic acquisition page.
Frequently Asked Questions
What does verifying a token contract actually do?
It publishes source code that compiles to exactly the bytecode already deployed, so anyone can read what the contract does. Without it the token is machine code nobody outside the team can inspect, and careful buyers, trackers and exchanges treat that as a warning sign before they look at anything else.
Why does contract verification keep failing?
Usually because of a mismatch in compiler version, optimiser setting, optimiser run count or target EVM version, or because the constructor arguments were not ABI-encoded. A single differing optimiser run produces different bytecode and a rejection without a useful error, so compile locally and compare the bytecode first.
Do I need to verify a proxy contract separately?
Yes. An upgradeable token is a proxy plus an implementation, and verifying only the proxy shows forwarding logic and nothing else. Verify both, mark the proxy as a proxy in the explorer, and repeat after every upgrade because each new implementation is a new unverified contract.
Is a verified contract safe to buy?
No. Verification proves the published source matches the deployed bytecode and nothing more. A verified contract can still contain an unrestricted mint function or an owner who can drain it. An audit assesses the code; verification only makes the code visible so that someone can assess it.
Does verification carry across chains?
No. Verification is per explorer and per deployment, so a token verified on its home chain is unverified everywhere it has been redeployed or bridged until each chain’s explorer is done separately. Keep one list of every address by chain and check each entry from the outside.